
Z axis banding problem and solution. A platysmaplasty surgery also commonly known as corset platysmaplasty is a type of neck lift surgery that addresses these muscles specifically tightening and reconstructing the platysma muscle to repair the loose sagging or banding skin on the neck.

Z Axis Banding Problem And Solution Youtube
If you over tighten the screws it could bind 1.
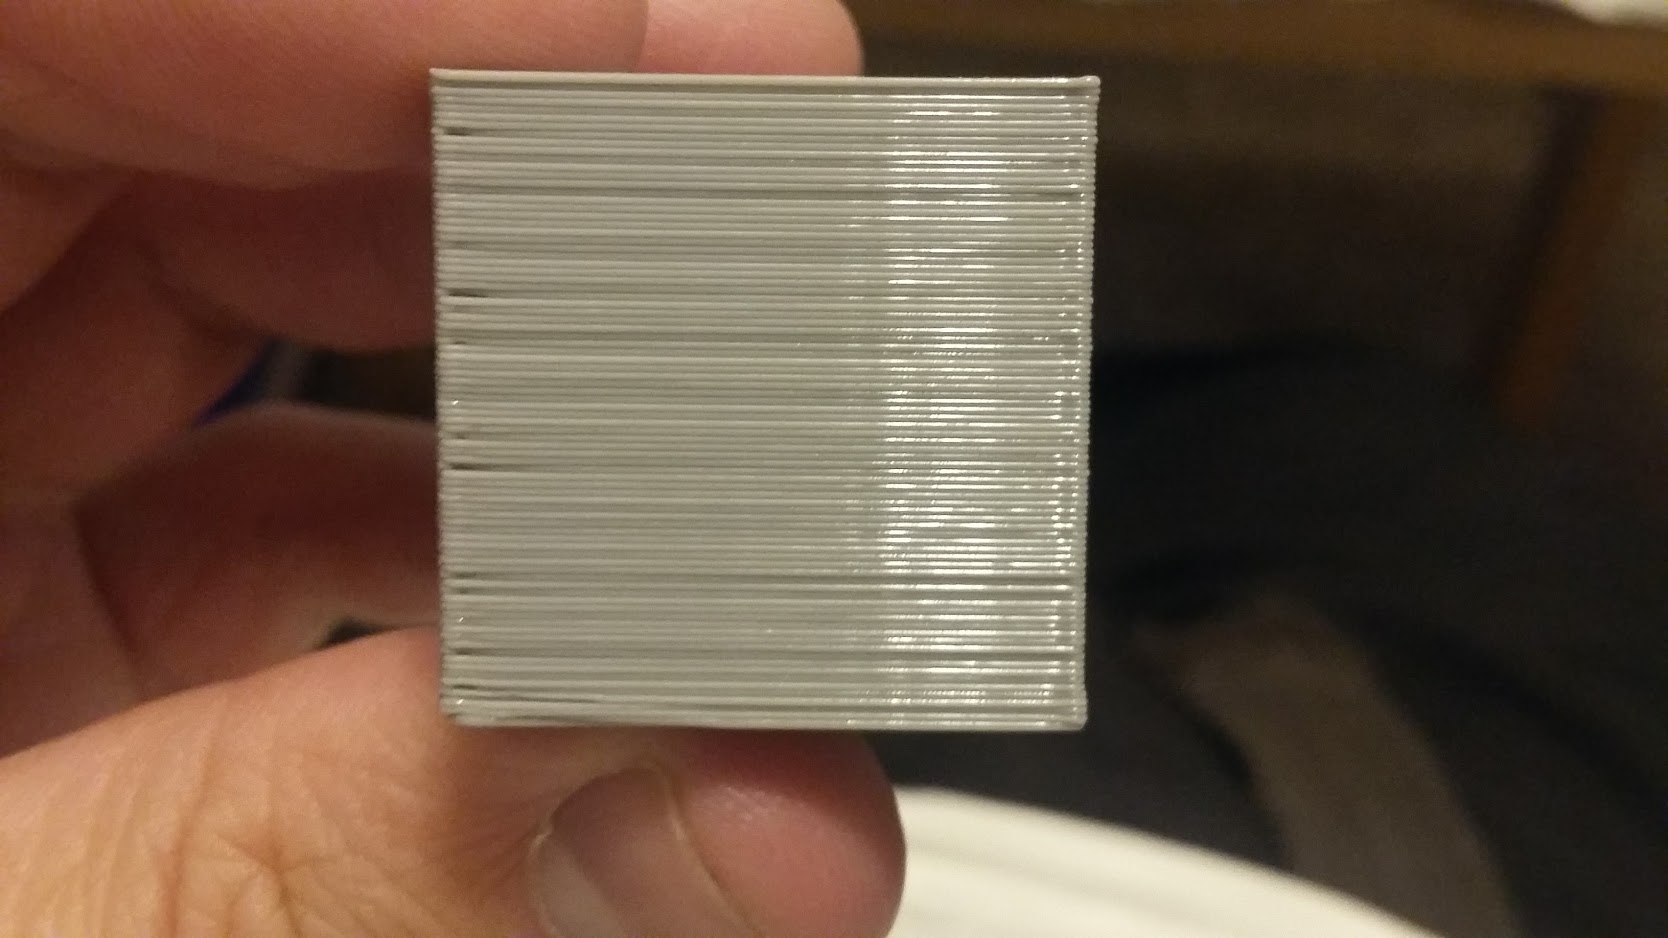
How to fix z banding. The simple cause of most Z wobble or Z Banding that it manifests itself as in your print is because the threaded rods are bent even if ever so slightly. A quick way to zoom in sufficiently is to click -1 for 100 zoom. This puts a lot of lateral pressure on the z-nut and build platform.
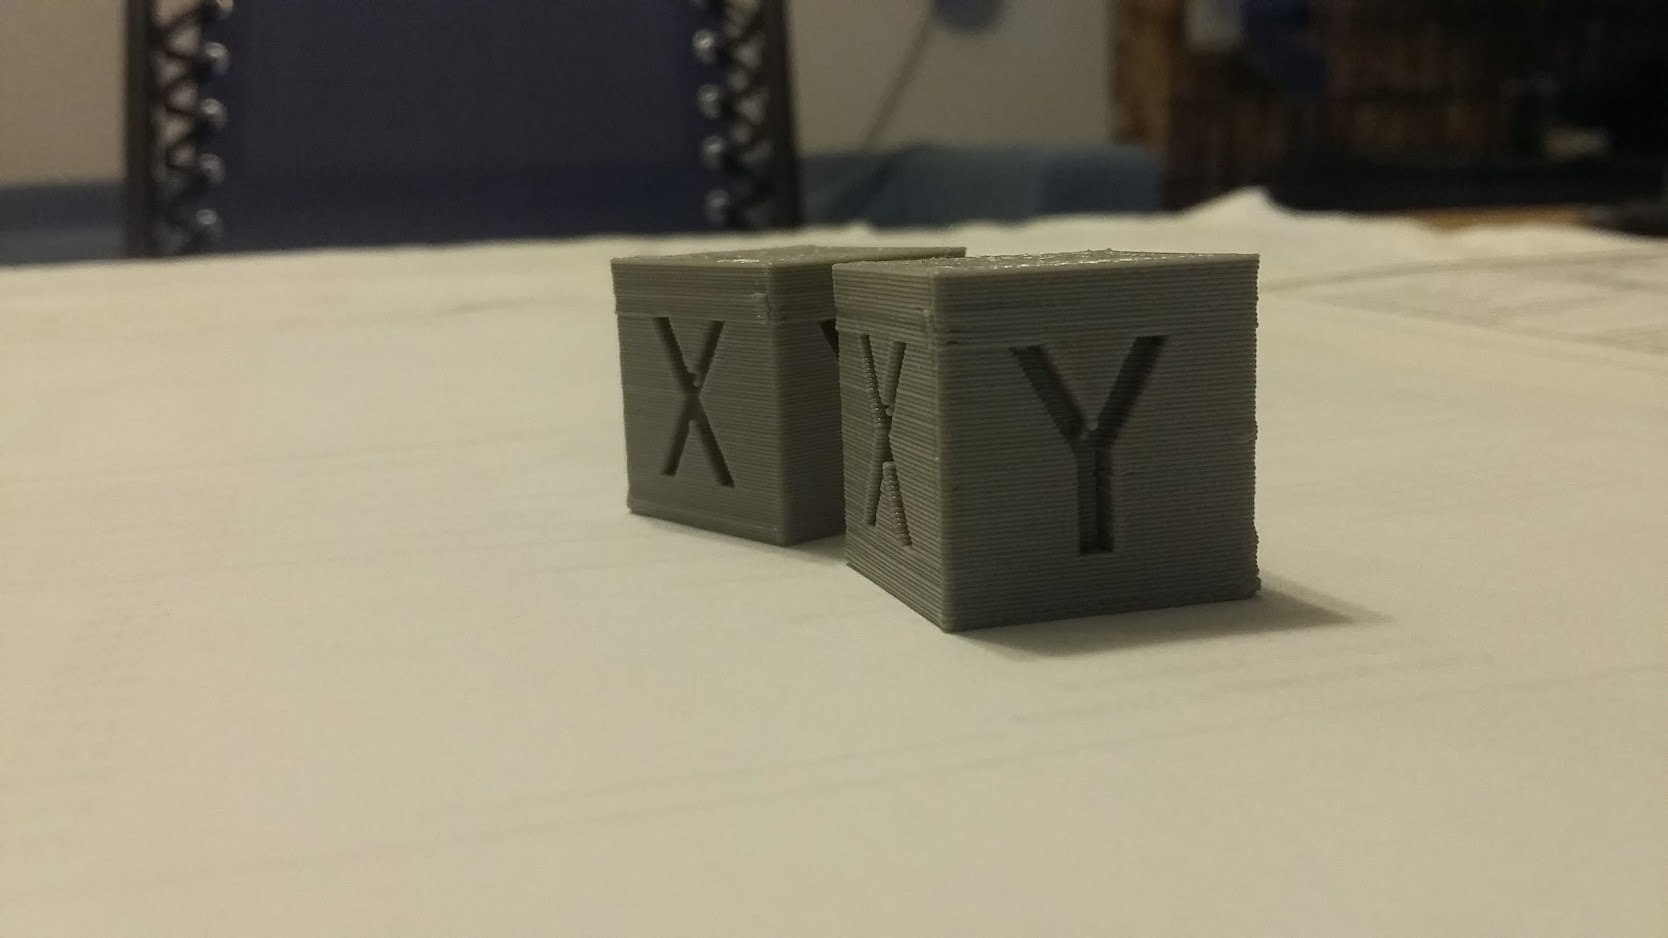
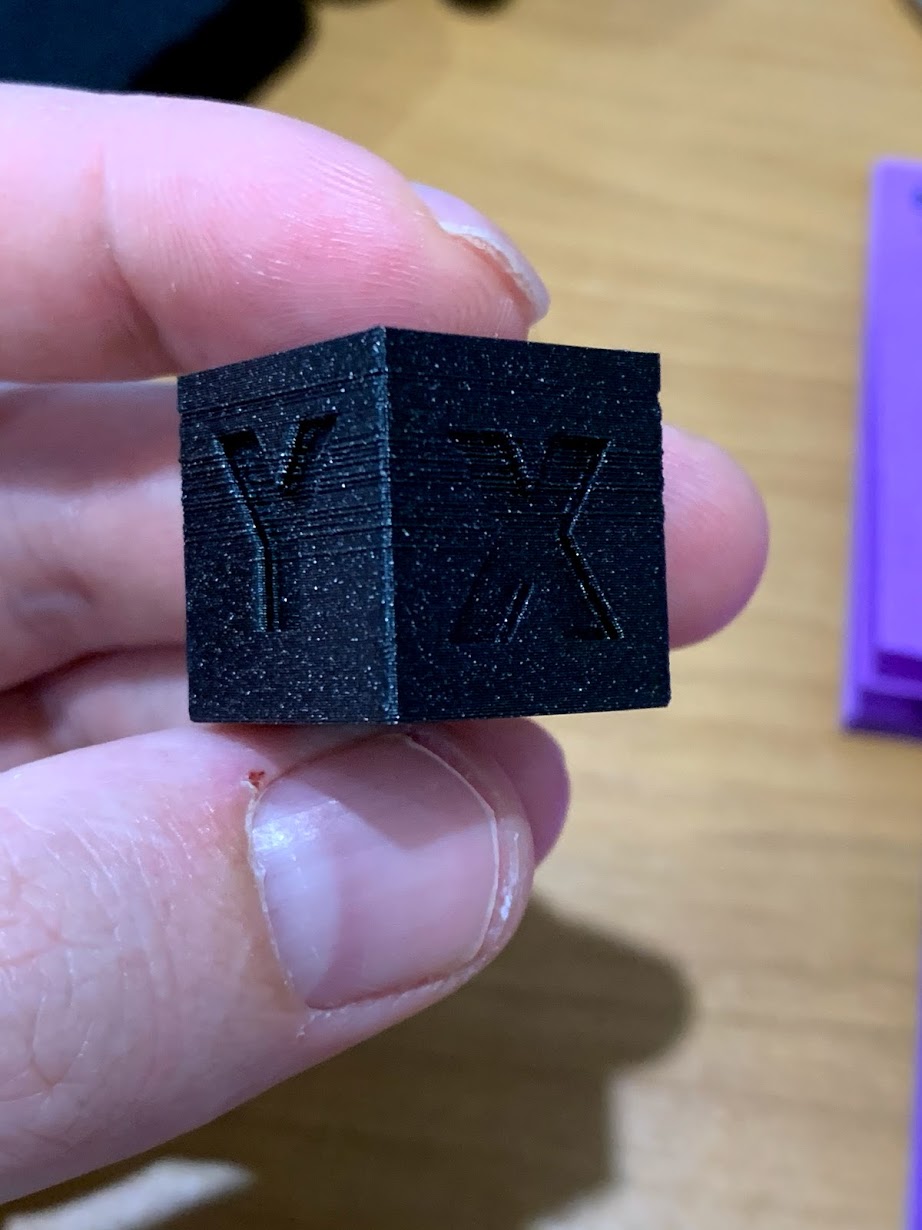
One I assembled myself had Z-axis binding the one my son assembled did not. The first picture makes it look way worse than it really is but it isnt insignificant. As a reminder most common print quality issues can be found in the Simplify3D picture guideMake sure you select the most appropriate flair for your post.
You can see obvious examples on any website that lists banding as a negative for the Z6 or Z7 yet not in their review of the EOS R. Im going to try a second one with Loops go from inside to outside of perimeter unchecked to see if there is any improvement but in the mean timeany ideas what could be causing this. Install the first length of Z-flashing.
A faulty stepper motor might also cause Z. If playback doesnt begin shortly try restarting your device. If you zoom in to around 100 and the banding goes away it isnt real.
The screws that hold the nut plate on could be loose allowing that plate to move. Check the brass nuts that the Z rods thread through on the x-axis gantry. I noticed that there are a lot of people who experience Z banding inconsistent extrusion or other issues in their prints.
Artillery Sidewinder X1 calibration guide. Using a low-cost 3D printer like CTC DIY I3 Pro B Geeetech I3 Pro B clone with M8 threaded rods as Z axis with loose or floating ends is what you get and so also some wobble or banding on the X axis due slightly bent M8 threaded rods they barely come straight. I experienced two different printers.
This is sometimes wrongly assumed to have been corrected by replacing the threaded rod with a lead screw. Try using Z offset to adjust where your 3D printer starts printing. So if the file youve encountered banding issue with is a 16-bit file the only way to fix it is to add noise.
Having trouble getting your prints to stick. Heres how do it most effectively. So I recently purchased two Creality Ender 3s and assembled them yesterday.
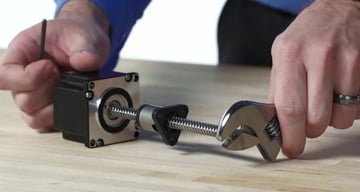
Want to print on top of an existing object. In this video I adjust th. Measure the top and bottom distance of the lead screw from the frame.
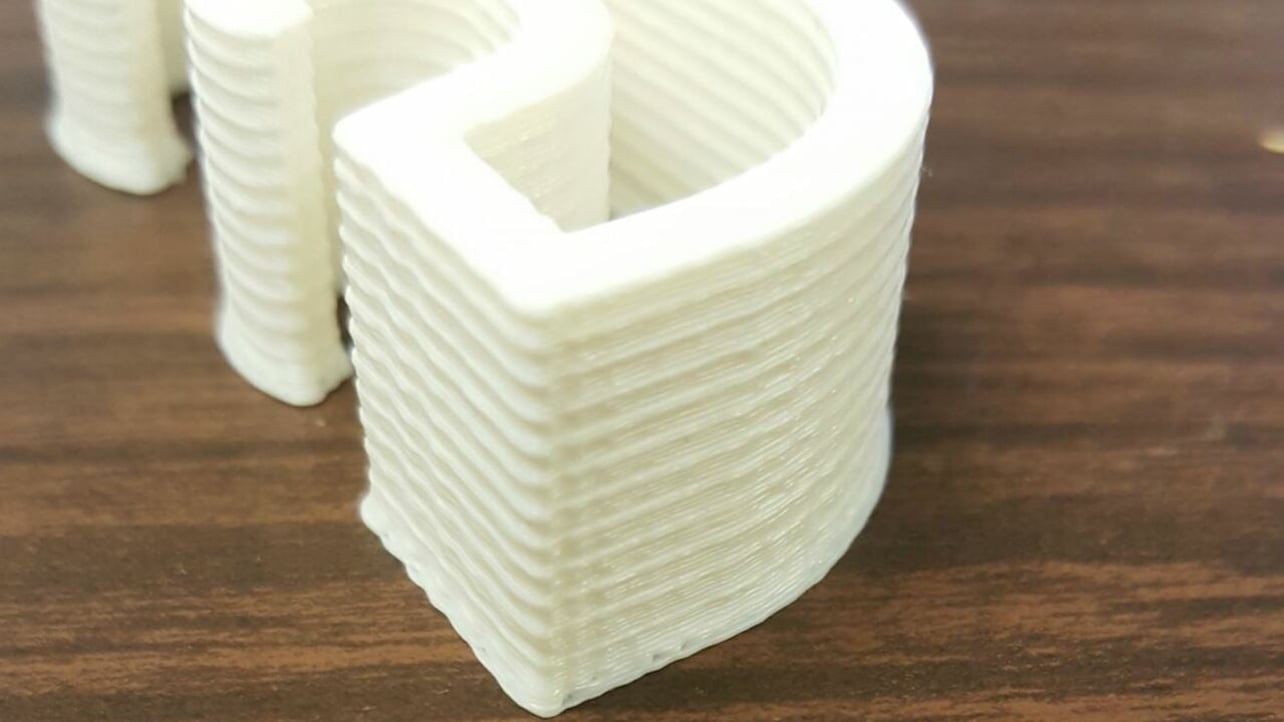
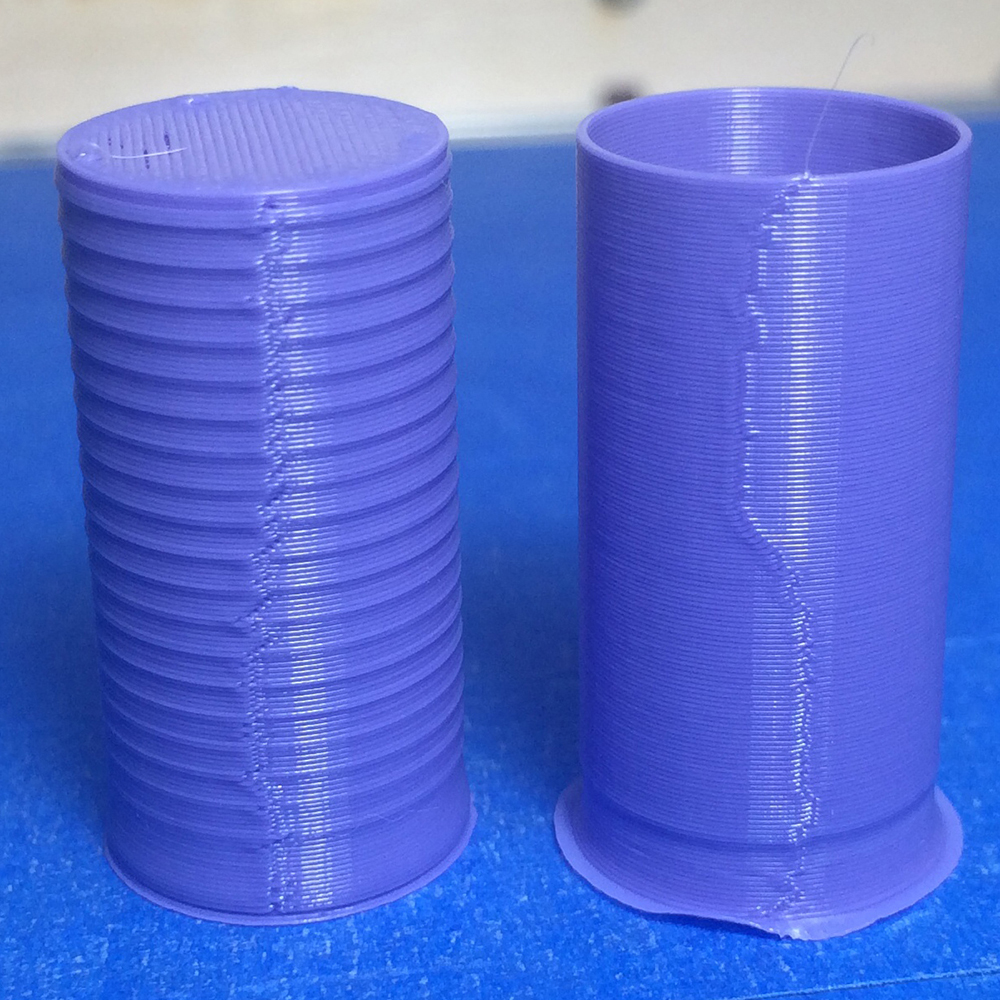
I noticed the walls of the Optical Illusion Vase PLA test piece from the previous video appeared to have noise or random shadows. Rubber-Band Ligation Banding Your doctor will take a tiny rubber band only a few millimeters wide and put it over the base of an internal hemorrhoid to cut off the flow of blood. They should be pretty close you may need a shim.
Several others copy the procon page and hammer out a watered-down version of the original review. If you dont want to zoom in and out theres another way you get rid of the preview artifacts. The z-threaded road had about 5mm run-out at the tip.
Begin at either end of the wall and set the level middle section of the Z-flashing onto the top edge of the siding panel with the wider flange upward and against the wall framing. The more the bend the more the Z banding. One or two big websites publish a set of high-quality tests.
When you tighten it keep trying to move the Z-axis. I just finished a decent size print with my Rostock Max with KISSlicer and have very consistent banding in Z. The best way to fix Z banding in your 3D printer is to replace your Z-axis rod if it is not straight enable consistent beSold temperature with PID and use layer heights which avoid your 3D printer using microstepping.
Create a new Overlay layer filled with 50 gray by clicking ControlShiftN and setting mode to Overlay and checking Fill with Overlay-neutral color 50 gray. Videos you watch may be added to the TVs watch history and influence TV recommendations. Flush the end of the flashing length with the wall corner and secure the flashing to the framing with an 8d nail at each wall.
After trying unsuccessfully to get support to send me another I figured I had nothing to lose and straightened the threaded rod by hand and shimmed the motor level. Please remember to include the following details to help troubleshoot your problem.

How To Fix Z Banding 3dprinting
Weird Z Banding Pattern Any Tips Pla 195 40mm S 15 Grid Infill 2 Walls Skr Mini E3 V2 Belts Ok Lead Screw Not Bent Ender5
How To Fix Z Banding Ribbing In 3d Printing 5 Easy Solutions To Try 3d Printerly


How To Fix Z Banding Nikko Industries
Z Banding Z Wobbling What Is It How To Prevent It All3dp

Horizontal Banding Elimination Thread Improve Your 3d Prints Ultimaker Community Of 3d Printing Experts

How To Fix Z Banding Ribbing In 3d Printing 5 Easy Solutions To Try 3d Printerly
Z Banding Page 1 Xyz Printing Help Repair Maintenance Soliforum 3d Printing Community
Horizontal Banding Bad Lulzbot Taz Lulzbot
Z Banding Page 1 Xyz Printing Help Repair Maintenance Soliforum 3d Printing Community

Expert Mods Z Banding Ribbing Fix 1 2 Youtube
Z Banding Issues Assembly And First Prints Troubleshooting Prusa3d Forum
Z Banding Z Wobbling What Is It How To Prevent It All3dp
Z Banding Ribbing Build It Full

How To Fix Z Banding Nikko Industries

Z Wobble Repair Artillery Sidewinder X1 Youtube Repair Wobble Artillery
Z Banding Page 1 Xyz Printing Help Repair Maintenance Soliforum 3d Printing Community
Z Banding Page 1 Xyz Printing Help Repair Maintenance Soliforum 3d Printing Community

How To Fix Z Banding Ribbing In 3d Printing 5 Easy Solutions To Try 3d Printerly